One of the benefits of shooting two-camera interviews is the ability to cut between angles without having to use b-roll to cover an edit.
For an example of this technique see On the Road with Danny Wilcox Frazier, an interview with the Driftless photographer.
Final Cut syncs two-camera interviews by creating multiclips. Multiclips act as a sort of wrapper, bundling two or more angles into one clip so that you can seamlessly edit between them.
(NOTE: This workflow assumes that you have asked your subjects to clap their hands at the beginning of the interview as a way to sync your cameras during the editing process.)
The first step in editing a two-camera interview is to make sure both tapes will be in sync when you create the multiclip.
To do this, load the clip from the first camera angle into Final Cut’s Viewer.
Mark an IN point (I) at the first frame of your subject clapping. You may need to scrub
back and forth with the arrow keys to find it. On occasion, the visual may appear to be a frame or two off from the actual clap. Mark IN based on the sound, not the picture.
Repeat this process with your clip from the second camera angle. Mark an IN where you hear the clap here, too.
CREATING MULTICLIPS
Back in the Browser, select the clips from both cameras.
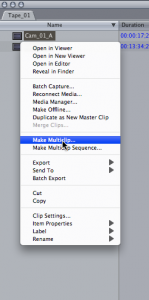
Right-click and select Make Multiclip…
The Make Multiclip window will now appear. In the Synchronize using: drop-down menu, select In Points. Your clips will now be synchronized using the In Points created in the previous step.
The blue lines in the Make Multiclip window indicate where the two clips will overlap. The darker area shows where a tape begins and ends.
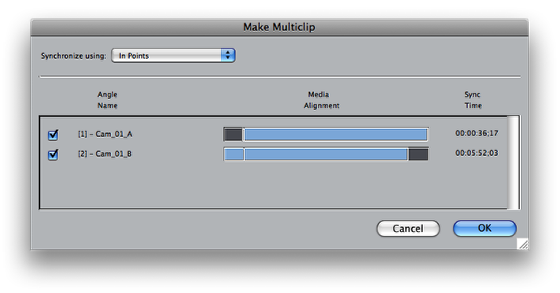
In the Make Multiclip window, press OK.
A new multiclip will appear in the Browser.
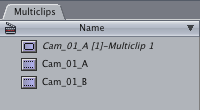
Final Cut only allows you to rename the latter half of the multiclip. The name before the dash remains as the name of the tape. Within your sequence, this portion of the name will change depending on which camera angle is active.
SELECTING THE BEST AUDIO
Double click the multiclip. It will open in the Viewer.
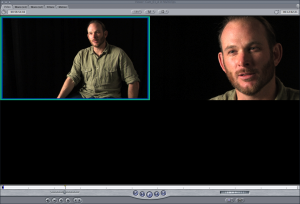
The Viewer now displays the two angles available in the multiclip.
In the Playhead Sync menu above the Viewer, select Video+Audio.
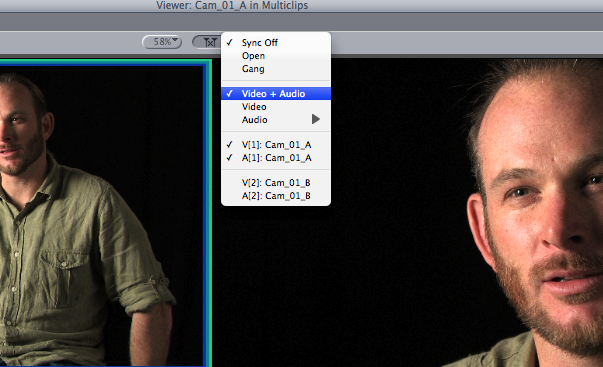
The blue and green rectangle surrounding one of your clips indicates the active angle, the one that will be visible in the Canvas once you insert your multiclip into the timeline. The Blue denotes video, the green audio.
With the Playhead Sync menu above the Viewer selected to Video+Audio, you are watching and listening to video and audio from the same angle.
Click on the other clip, and the blue and green boxes will follow.
Listen to both clips in order to determine which has the higher audio quality.
Select the clip with the better audio.
Next, choose Video from the Viewer’s Playhead Sync menu.
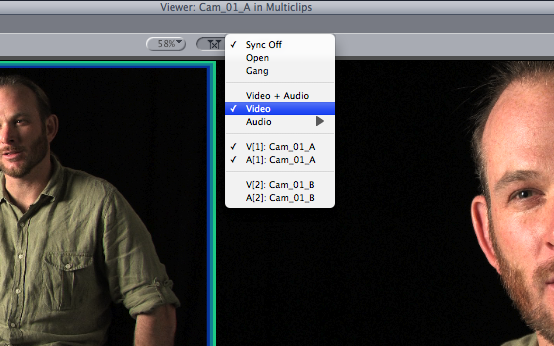
Now when you switch angles, the audio will remain connected to the better sound and only the video, as indicated by the Playhead Sync, will change. (Make sure the green box stays on the angle with the better audio throughout the editing process.)
Insert the entire multiclip into a new sequence (F10).
In the drop-down menu attached to the timeline, select Multiclip Playback to ensure proper playback.
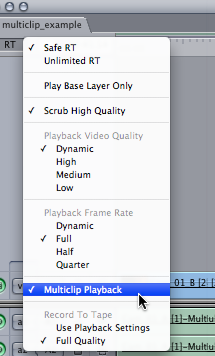
With the multiclip now in the sequence, follow these steps:
1. Turn on waveforms (command-option-W).
2. Toggle Clip Overlays (option-W).
3. Delete the channel with no audio.
4. Duplicate the other channel so that you now have two strong audio channels.
5. Pan the top channel to 1. Pan the bottom channel to -1.
6. Link the two audio channels (option-L).
7. Mix the audio to -12.
8. Normalize to 0.
WATCHING IN THE CANVAS
Multiclips display only the active angle in the Canvas window.
To view all of the angles available to you, select Open from the Playhead Sync menu above the Canvas.

Now, as you move the playhead across the timeline, you will see the active view in the Canvas as well as all of the angles in the Viewer.
CHANGING THE ACTIVE VIEW
There are several ways to change the active angle when editing.
Method One:
First, make sure the Viewer’s Playhead Sync is set to Open, as described above.
Play your sequence. As it progresses, click between angles in the Viewer window.
Each time you click a different angle, a blue marker appears at that point in the timeline.
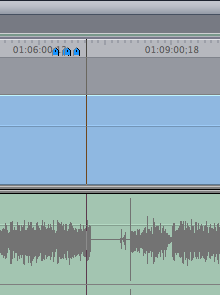
Once you stop playing, the blue markers transform into edit points.
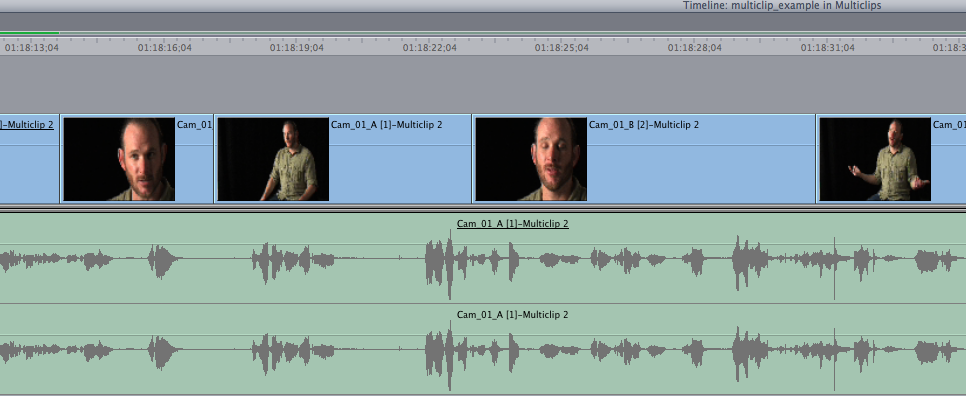
Method Two:
Use the blade tool, or control-V, to create smaller clips within the Timeline.
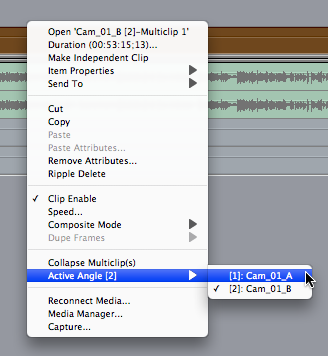
To change the active angle displayed in the Canvas, right-click the video channel and select Active Angle. The pull-out menu will appear, allowing you to choose between angles of your multiclip.
With a little practice, multiclips offer a quick and relatively painless means to sync multi-camera shoots.
Learn more about our approach to producing multimedia by purchasing MediaStorm’s Post-production Workflow. Spanning more than 200 steps, the workflow covers every phase of editing, from organizing and editing assets in Final Cut Pro 7 through backing up and archiving your project. The workflow includes exclusive access to our Aperture Workflow and our Final Cut Asset Parser. Learn more about MediaStorm’s Post-production Workflow.
References: The Essentials of Multicam Editing in Final Cut Pro Pro by Steve Martin, on Kenstone.net.

