Note: This workflow follows the guidelines for setting up Final Cut Pro 7 found in Tips from the MediaStorm Final Cut Pro Workflow (see: Preliminary Setup, page 2 and Additional System Settings, page 11)
After your project is complete and your output has been encoded, the next step is to archive your project.
MediaStorm uses Mac Pro computers with four internal drives: one for the system software, one for project media, and one backup of each. When a project is complete, we remove the media drives and prepare them for archiving.
Copying Your Files
Copy your entire project folder to an external drive. (If you are already using an external drive that you intend to archive you can skip this step.)
Make sure to include all of your media. The reason MediaStorm copies all files is, in part, because Final Cut Pro’s Media Manager is simply undependable.
The other reason is safety. You never know when you might suddenly need to alter a project. With the proliferation of inexpensive drives, it’s good practice to keep all of your source material.
In addition to the project folder–which should include all graphics, audio, and video associated with the project–copy any fonts you used to the Graphics folder of your archive drive. This way, your fonts will be available for installation on other computers.
Fonts are generally installed in your user name/Library/Fonts folder.
Testing the Archive Drive
Before deleting your project from the original drive, you’ll first need to test your archive, and then make a backup.
Connect your archive backup to a different computer. This way you can ensure that your project is referencing only assets on the drive.
Install any necessary fonts from your graphics folder and open your project file.
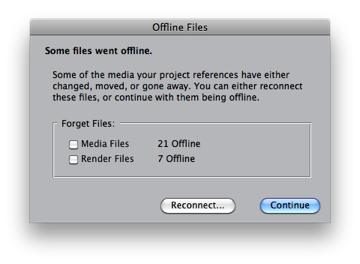
Final Cut will notify you if any files are offline. Frequently, you’ll receive a warning that files are missing.
This is because FCP is still referring to the original folder structure.
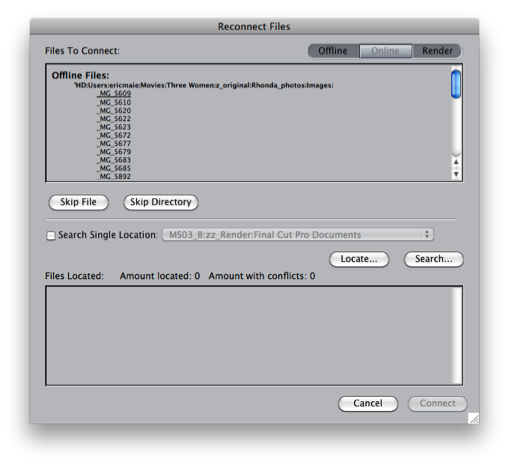
Select Reconnect… and in the following menu, choose Locate… to find your missing files.
If you’ve followed Tips from the MediaStorm Final Cut Pro Workflow your render files will be stored in a folder named z_render at the root of your media drive. These files are not copied to the archive drive. Therefore, you may need to render (option-R) before you can play your archived project. (See page 11, Additional Systems Settings from Tips from the MediaStorm Final Cut Pro Workflow for more information on setting up your render folder.)
Finally, after your fonts are installed, your media is reconnected, and you’ve rendered, view your final project in its entirety.
Once you’ve confirmed that your archived version is accurate, copy it to a second backup drive. It’s imperative to have at least one backup of every drive. It’s an old saying, but should be repeated: there are two kinds of computer users, those who’ve experienced a hard drive crash and those who will.
For more information on duplicating drives, see MediaStorm’s Guide to Backing Up.
Deleting Your Project
When your two external backups are complete, it’s safe to delete your project folder from the original drive(s). Simply drag your project folder to the trash or select it and press command-delete key.
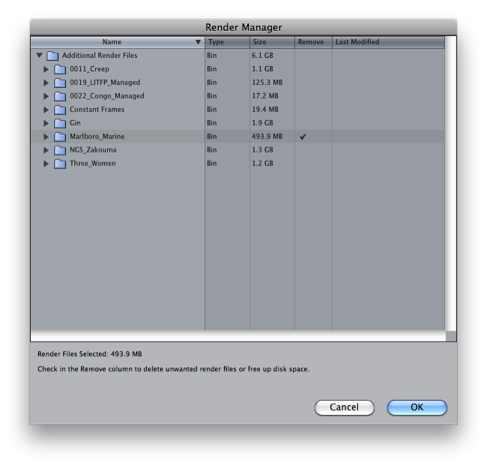
Next, delete the project’s render files in the z_render folder from your original drives. Use Tools>Render Manger.
Place a check mark in the Remove category adjacent to the files associated with your deleted project.
If your archive contains numerous drives, make sure to clearly label each. MediaStorm also uses a Google Doc spreadsheet to keep track of projects, file sizes, and drive locations.
Learn more about our approach to producing multimedia by purchasing MediaStorm’s Post-production Workflow. Spanning more than 200 steps, the workflow covers every phase of editing, from organizing and editing assets in Final Cut Pro 7 through backing up and archiving your project. The workflow includes exclusive access to our Aperture Workflow and our Final Cut Asset Parser. Learn more about MediaStorm’s Post-production Workflow.


