This article is part of a series of posts with tips and tricks from our producers’ experience working with Adobe Premiere Pro CC after years of working in Final Cut Pro. To read more about why we made the switch, check out this post.
When it comes to backups, you can never have enough.
Fortunately, Premiere Pro’s Auto Save vault (File > Project Settings > Scratch Disks…) allows you to backup your project file at user-specified intervals.
I’ve written previously about how to enhance this functionality with Noodlesoft’s $25 Hazel. Hazel essentially watches your vault for updated versions and then copies them to a secondary destination of your choice, all automated and in real time.
The reason for this added protection is that even if you backup your work every evening, what happens if your drive dies in the middle of the afternoon? You could potentially lose hours of work.
With the advent of Premiere Pro CC, Adobe now offers users 20GB of free online storage. This makes for another great location to store automated backups. With the assistance of Hazel, you can think of this storage as an Auto Save vault in the cloud.
Setting Up Creative Cloud
To set up your online storage, log in to creative.adobe.com, select Download Center on the menu bar and choose the Creative Cloud application.
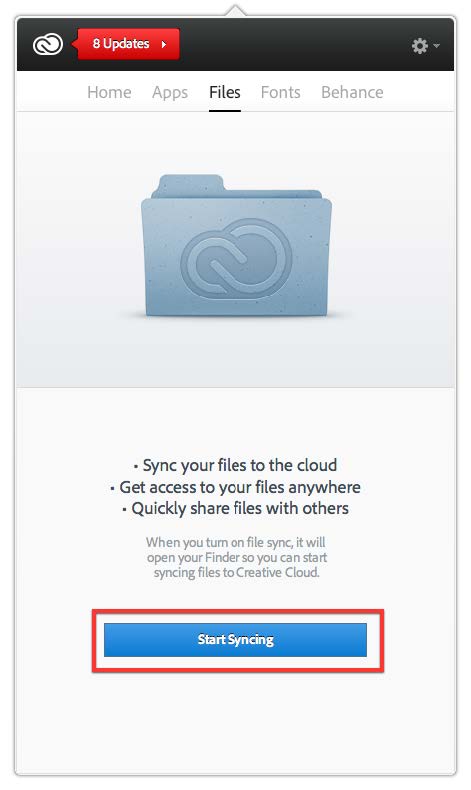
Once installed, click on the menu bar icon, log in and select Files.
Click the Start Syncing button.
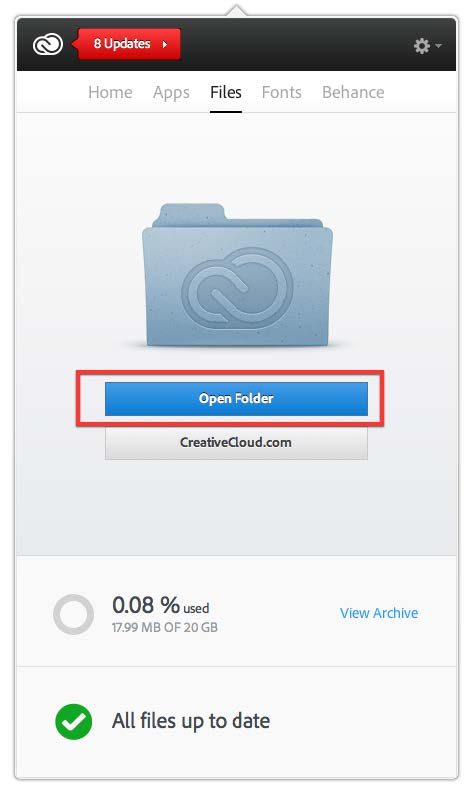
Creative Cloud will create a folder in the Finder on the top level of your user directory. You can navigate there by selecting the Open Folder button.
Anything stored here will automatically be synced to the cloud.
Hazel Rule
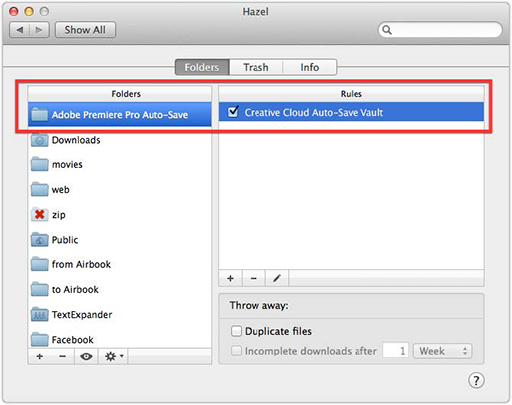
Next you’ll need to set up your Hazel rule. First, open Hazel in your System Preferences…
Click the plus button, on the bottom left side, under the Folder section.
Navigate to the Premiere Pro Auto Save vault.
Then, in the right column, below Rules, click the plus button to create a new rule.
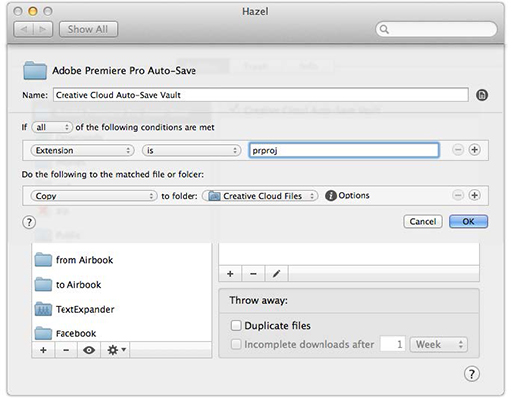
Name the rule Creative Cloud Auto Save Vault.
Then add the following conditions:
If the extension ends with prproj (Premiere’s file extension), copy the file to the Creative Cloud Files folder in your user directory.
These files will then be synced to the cloud.
If disaster strikes, you can then retrieve your files online at creative.adobe.com.
As the saying goes, there are two kinds of people: those who have lost their files because of a computer malfunction and those who will.


