
This article is part of a series of posts with tips and tricks from our producers’ experience working with Adobe Premiere Pro CC after years of working in Final Cut Pro. To read more about why we made the switch, check out this post.
In earlier versions of Premiere Pro, it was necessary to put media onto a timeline before exporting.
The latest update to the program, Premiere Pro 2014, changes this, making it easy to export any asset or even an entire sequence straight from the Project window.
Here’s how:
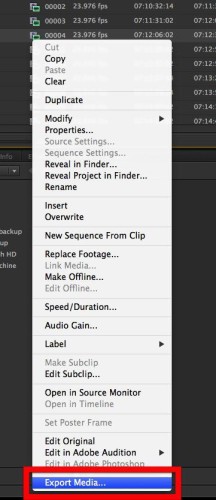
In the Project window, simply select a clip or sequence. Then, right-click and choose Export Media… at the bottom of the menu.
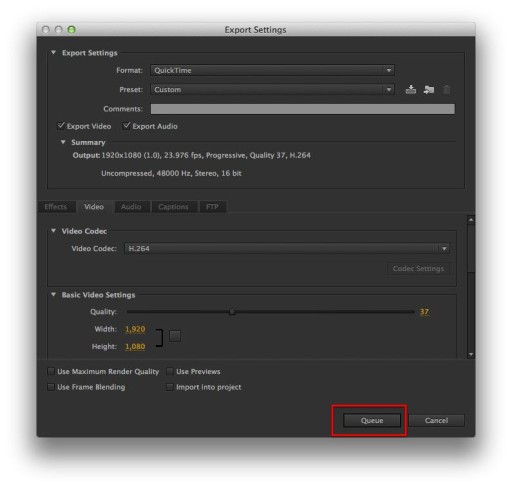
In the resulting Export Settings window you’ll have the option to select your export setting and the length of the file/sequence, just as you would from the timeline using the File > Export > Media… menu (Command-M).
Note that if you select more than one item, you’ll need to select the Queue button which will send your files to Media Encoder.

It’s worth noting that when you export a clip or group of clips, the Export Settings window does not contain a Match Sequence Settings button. So double check that your output settings are correct.