

This article is part of a series of posts with tips and tricks from our producers’ experience working with Adobe Premiere Pro CC after years of working in Final Cut Pro. To read more about why we made the switch, check out this post.
Let’s say you’ve mixed your audio and for whatever reason it’s consistently a little too low or a bit hot. Sure, you could return to your timeline and remix again, but that’s time consuming.
Premiere Pro 2014 offers a quick and elegant solution.
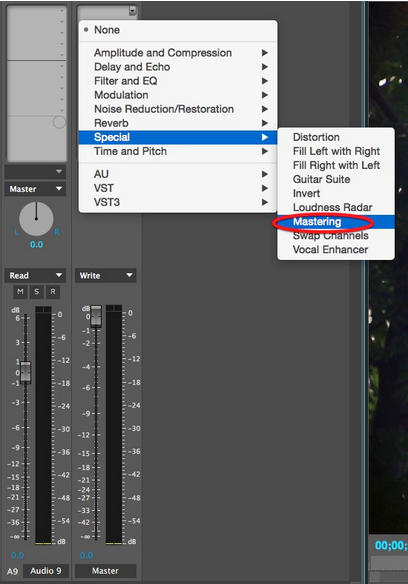
First, open the Audio Track Mixer. (Note that this is different from the Audio Clip Mixer.)
Open the disclosure triangle on the top left side.

On the far right, you’ll see the Master channel. In the grey box above it, hover over the right-side dot, then right-click Special > Mastering.
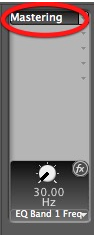
You’re FX Slot should now look like this:
Double-click the Mastering effect and the Track Fx Editor-Mastering window will appear.
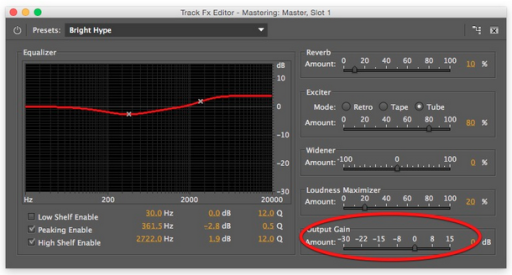
To adjust your overall audio relative to it’s current volume, simply slide the Output Gain accordingly.