This article is part of a series of posts with tips and tricks from our producers’ experience working with Adobe Premiere Pro CC after years of working in Final Cut Pro. To read more about why we made the switch, check out this post.
At MediaStorm, we are meticulous about how we crop the photographs in our films.
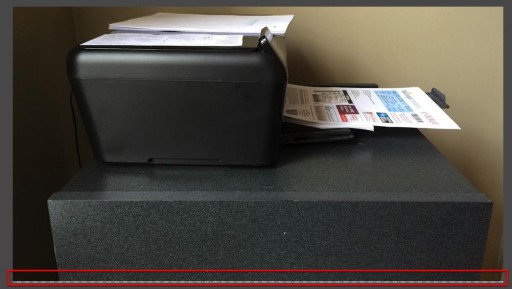
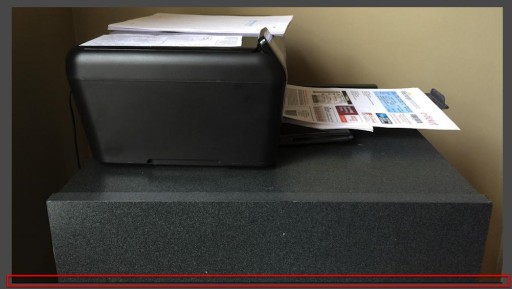
Even so, sometimes when a picture has black edges it can be difficult to see exactly where the photograph ends and the default black background of Premiere Pro begins.
Sometimes a sliver of of black slips through undetected.
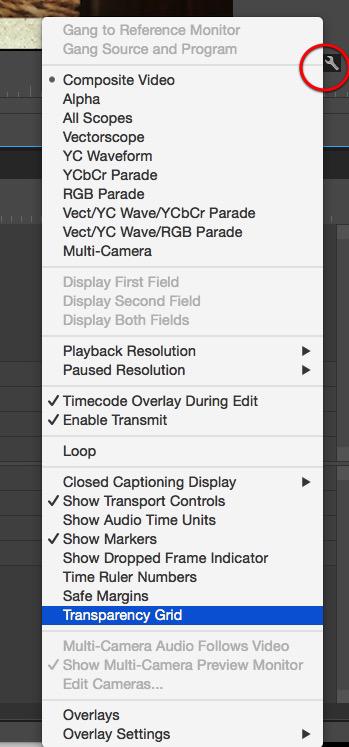
Recently, I stumbled across a Premiere Pro setting that makes it easier to distinguish between an image and black background, the Transparency Grid.
To turn on the transparency grid, simply click the wrench in the Program Window and select Transparency Grid.
The default black background will change to a grey and white checkered pattern.
Notice, how much easier it is to see the edge of the frame when the transparency grid is turned on.