MediaStorm Guide to Selecting Edit Points in Premiere Pro Without the Mouse

This article is part of a series of posts with tips and tricks from our producers' experience working with Adobe Premiere Pro CC after years of working in Final Cut Pro. To read more about why we made the switch, check out this post. A reader who is new to Premiere Pro writes, “OK, I cry uncle. I can’t for the life of me come up with an efficient way to use the keyboard to select the end or beginning of a clip. How do you do it? Do you use the mouse?” Turns out that selecting edit points with just the keyboard is simple. Just press the T key and Premiere Pro will select the edit points closest to your playhead. Here’s the trick though: Premiere Pro will only select the tracks that are highlighted in the left column. In the example below, pressing T selects only the edit point for…

Continue ReadingMediaStorm Guide to Selecting Edit Points in Premiere Pro Without the Mouse

MediaStorm Guide to Sharing Sequences Between Computers in Premiere Pro CC

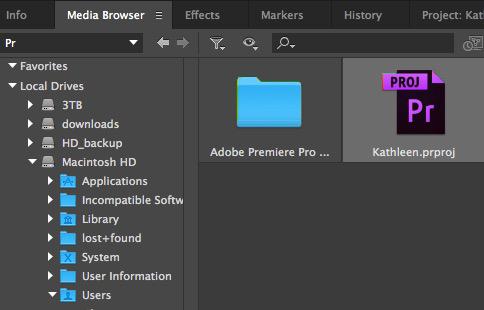
This article is part of a series of posts with tips and tricks from our producers' experience working with Adobe Premiere Pro CC after years of working in Final Cut Pro. To read more about why we made the switch, check out this post. Sharing sequences between team members is easy with the latest version of Premiere Pro CC. As often happens during our workshops, a participant will cut a sequence using her laptop. We’ll then need to import that work into the main project on a second computer. Here’s how we do it: In the Media Browser window (Shift–8), navigate to the project file that contains the sequence you’d like to import. Double-click the file and you’ll see all of the sequences and media available in that project. To import, simply drag the relevant sequence from the Media Browser to the Project window. A couple of caveats: first, make sure that…

Continue ReadingMediaStorm Guide to Sharing Sequences Between Computers in Premiere Pro CC

In Defense of Taking Your Time

Editing–good editing–is rarely done quickly. You might call it a slow process but I prefer to think of it as a deliberate one. We think, we ponder, we reconsider. Because good work, work that illuminates some previously hidden part of ourselves and the audience, does not come quickly. For me, creativity is always intertwined with intuition. David Mamet described it like this, “Art is the spontaneous connection of the artists to his own unconscious—about insight beyond reason.” Sometimes it feels like scampering around in the darkness. We dig and we shape. And we take up time. Once, I wrote and directed a five-minute film that took three years to finish. A two-minute one took the better part of a year. To finish is to exhaust all other possibilities. I don’t know a better way. You can compare yourself with others, worry about sliding in to a deadline last minute but here’s the truth:…

Continue ReadingIn Defense of Taking Your Time

Transcription and Text, Working Together: The Premiere Pro CC I Want

In a digital world, transcription feels like tube amps and mechanical typewriters. It’s an affront to all things modern. In short, it’s a laborious process that kind of sucks. Sure, Premiere Pro has some built-in tools, but they feel mostly like an experiment and a bad one at that. Apple offers a dictation service that is remarkably good with a human voice but falls short when you feed an audio file to it. So how come a better solution doesn’t exist, one that offers a deep integration between the timeline and a transcript? Adobe, if you’re listening, here’s my dream for Premiere Pro CC 2016. Audio Transcription On Ingestion Import a file with audio and Premiere Pro automatically emeds a timecode-based transcript into the file. Text Document That Contains All Transcription In A Sequence Premiere Pro creates a text document based on which portions of a clip are used in a timeline.…

Continue ReadingTranscription and Text, Working Together: The Premiere Pro CC I Want

MediaStorm Guide to Quickly Scaling Images in Premiere Pro 2014

This article is part of a series of posts with tips and tricks from our producers' experience working with Adobe Premiere Pro CC after years of working in Final Cut Pro. To read more about why we made the switch, check out this post. Adobe Premiere Pro CC 2014 offers two ways to quickly scale a large image to the size of your sequence. To begin, add your image to the timeline, then right-click it. You’ll see two options: Scale to Frame Size and Set to Frame Size. While both options will resize your image, each does so in a slightly different manner. Scale to Frame Size changes the image Scale setting to 100%, effectively throwing out any addition resolution. If you need to further increase your image you will have to up-res it. Using Set to Frame Size will also scale your image to the sequence frame size but it does…

Continue ReadingMediaStorm Guide to Quickly Scaling Images in Premiere Pro 2014