MediaStorm Guide to Creating Subtitles in Premiere Pro

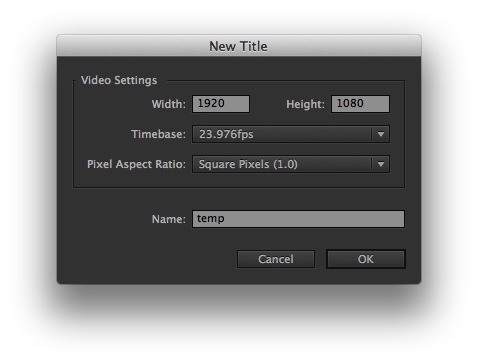
This article is part of a new series of posts with tips and tricks from our producers' experience working with Adobe Premiere Pro after years of working in Final Cut Pro. To read more about why we made the switch, check out this post. Today's post was written by MediaStorm producer Eric Maierson. There’s a critical difference between the title tool in Final Cut Pro and Adobe Premiere Pro. In FCP, one could slice a title that’s already in the timeline, open it in the Viewer window, then change the contents so that you now had two distinct titles. This does not work in Premiere Pro. In Premiere Pro each title is a distinct instance. So, if you splice a title in the timeline then change its content, you will also change the content of the first title as well. Both titles will say the same thing. The only way around this…

Continue ReadingMediaStorm Guide to Creating Subtitles in Premiere Pro

Three Quick Ways to Make Your B-roll Better

As a producer, I log hours and hours of video. There are three mistakes that I frequently see. They cut across all levels of experience. Fortunately, they’re easy to fix. Don’t Talk When Shooting B-roll It’s easy to think that you won’t need audio when you’re shooting visual sequences. But the truth is, b-roll is far more dynamic when it includes natural sound. B-roll with sound can be used for pacing between sections of your project or to cover interview sound bites and provide a rich texture. If you talk while shooting, you lose this opportunity. You’re left with just visuals. While you can sometimes get away with this, say when you use music, it’s far better to have the option of using natural sound. If you have it, chances are that you’ll find a use for it. Remember, no matter how softly you speak, the camera microphone will hear you. So…

Continue ReadingThree Quick Ways to Make Your B-roll Better

MediaStorm Guide to Organizing Assets with Color Labels

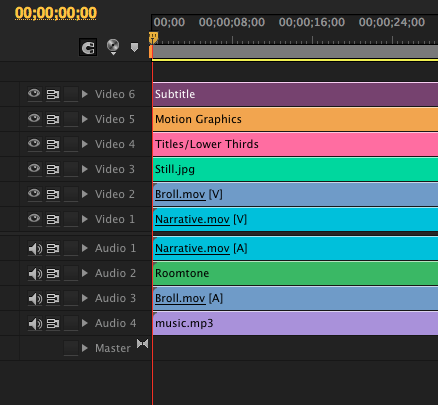
This article is part of a new series of posts with tips and tricks from our producers' experience working with Adobe Production Pro after years of working in Final Cut Pro. To read more about why we made the switch, check out this post. Today's post was written by MediaStorm producer Tim McLaughlin. At MediaStorm, we use tracks to organize by asset type on the timeline. It gives our timeline a level of organization and visual clarity that allows us to find specific items quickly. Additionally, because we often work on each others timelines, it gives us an immediate sense of familiarity with one another's projects. One of my favorite options in Adobe Premiere Pro is the ability to color code assets directly on the timeline, making the visual organization of the timeline all the more obvious. Below you’ll see a timeline color coded by asset. This post will teach you how…

Continue ReadingMediaStorm Guide to Organizing Assets with Color Labels

Standard Three-Camera Interview Setup

MediaStorm’s standard interview setup is meant to provide a clean, focused environment for the viewer. It can be used both in a studio or in the field. We typically use at least two cameras, usually three, both for visual variety and for editing on-camera sequences. This is by no means the only way to conduct an interview and you should consider the role and look of the interview before beginning a project. The example below is for an interview with the subject sitting screen-right. If you want the subject to be sitting screen-left, camera and lighting placement should be reversed. Visual Look Background - We often use a black background behind our subjects to focus attention on what the subject says and how he or she says it. A large felt cloth works nicely. Cameras - We currently use the Canon 5D Mark III for our interviews. Camera Settings - It’s important…

Continue ReadingStandard Three-Camera Interview Setup

Finishing is the Hard Part: The Details

In a previous post, I described some of the psychological challenges of finishing a project. Just as we're ready to be done, we must once again see our work hyper-critically in order to complete the final stages of production. In revisiting this topic, I'd like to offer a more detailed list of the steps we follow once the picture edit is complete. Keep in mind as you move through these steps that finishing a project is a non-linear process. You may be mixing audio when you discover an image that needs recropping. It’s OK to make that change, but try to stay on task as it’s easy to get distracted. Audio Mixing Audio generally requires less render time than video so it's a good place to begin. Add tone between interview bites Mix interview, tone, b-roll, and music Add one frame dissolves to the head and tail of all audio bites Fix…

Continue ReadingFinishing is the Hard Part: The Details