This article is part of a new series of posts with tips and tricks from our producers’ experience working with Adobe Premiere Pro after years of working in Final Cut Pro. To read more about why we made the switch, check out this post.
Today’s post was written by MediaStorm producer Eric Maierson.
One of the keys to getting up to speed on any editing application is to know your shortcuts.
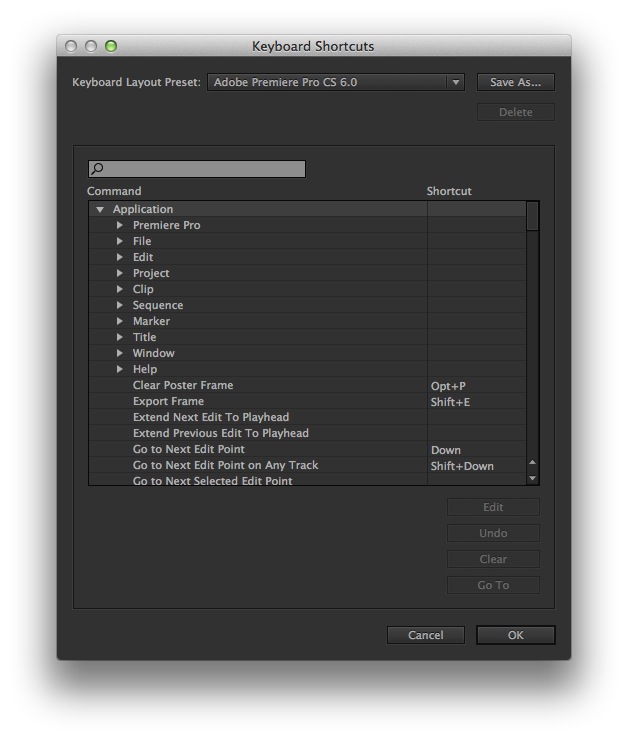
In Adobe Premiere, these are available in the Premiere Pro > Keyboard Shortcuts… menu.
 At the top of the window, you’ll see a pull-down menu labeled Keyboard Layout Preset. By default this is set to Adobe Premiere Pro CS 6.0. These are Adobe’s built-in shortcuts. If you’d prefer to use the more familiar Final Cut Pro 7 shortcuts, choose the Final Cut Pro 7.0 option from the pull-down menu.
After some debate, we’ve decided at MediaStorm to use the default Adobe Premiere shortcuts. Though it might be easier in the short run to use the more familiar ones, we believe that over time, using Adobe’s options will be easier when using shortcuts available throughout the company’s Production Premium collection including Photoshop and After Effects.
Still, there are some key tools that don’t employ keyboard shortcuts by default. In these instances, we’ve opted to use the FCP 7 shortcuts. Two of them are Clip Enable and Clip Link.
Here’s how to add them:
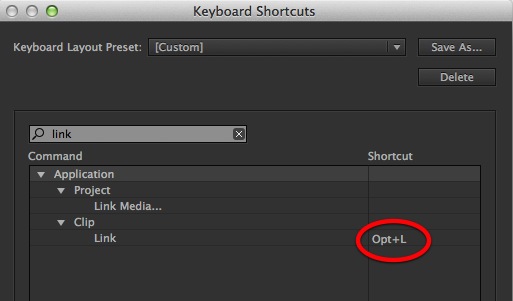
In the Keyboard Shortcuts window enter the word link in the search bar.
In theShortcut field adjacent to Clip > Link enter the familiar shortcut Option-L.
Repeat this process for Clip > Enable using the shortcut Control-B.
Other customizations we use are:
Option-G gain
Option-L link
Command-Option-T default transition
Control-B disable clip
Control-Option-Shift-Track number target video
Control-Shift-Track number target audio
Option-R render in to out
Option-V remove effects from clip
Command + increase video track height
Command – decrease video track height
Option + increase audio track height
Option – decrease audio track height
You’ll notice that the Keyboard Layout Preset changes to [Custom]. If you’d like to name your new keyboard layout press Save As… and enter a name.
Click OK when you’re done.
Keyboard Layouts are stored in ~/Library/Application Support/Adobe/Premiere Pro/6.0
with the extension .kys. You can copy these to a thumb drive or Dropbox so you can share your layouts between computers.
For a text version of Premiere Pro shortcuts see this handy list or follow @PrProshortcuts where I tweet one Premiere shortcut a day.
To learn more about how our producers are using Adobe Premiere Pro see our other blog posts on the topic. Also, follow our producers’ twitter feed @PrProShortcuts for Premiere shortcuts.
To learn more about our production style, you can purchase a copy of our Post-production Workflow. Readers who purchase our current Final Cut Pro and Aperture workflow automatically receive the Premiere workflow when it is released.
MediaStorm offers several online and in-person training opportunities at mediastorm.com/train.
Have you made a recent switch in your editing software? Let us know about it in the comments below.


