This article is part of a new series of posts with tips and tricks from our producers’ experience working with Adobe Premiere Pro after years of working in Final Cut Pro. To read more about why we made the switch, check out this post.
Today’s post was written by MediaStorm producer Eric Maierson.
Adobe Premiere Pro offers several ways to create a freeze frame from a video clip. Here are three options.
Hold Video
This is the most straightforward method.
In the timeline place your playhead on the frame you’d like to freeze. Then create a splice (Command-Shift-K).
Next, and this is important,select the clip. Then, from theClip menu, select Video Options > Frame Hold.
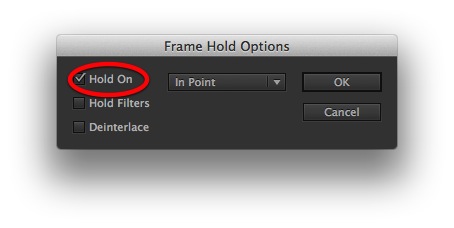
In the Frame Hold Options Window select Hold On and In Point from the drop down menu.
Your entire clip with change to your select frame.
To review the original clip again, move your playhead over the clip and use the F shortcut key to match the clip in the Source window.
Freezing a Section of a Clip
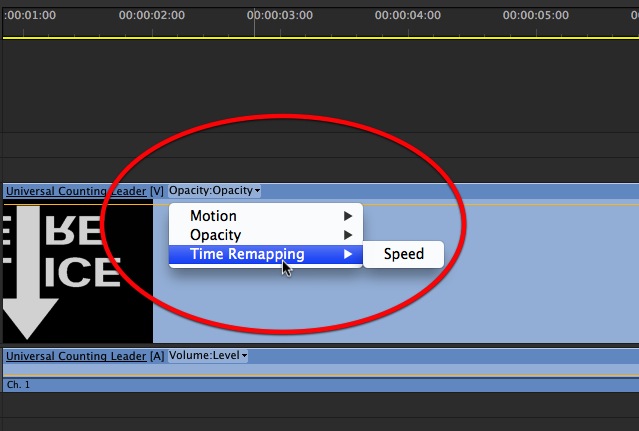
In the timeline, locate the clip you’d like to freeze and from the Clip Effect menu, select Remapping > Speed.
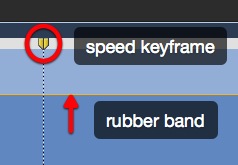
Command-click the yellow “rubber band” to create a speed keyframe.
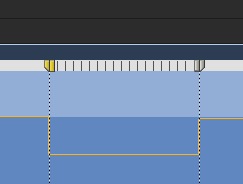
Holding Option-Command, drag the outer keyframe the duration you’d like to freeze.
The lower rectangular section is the freeze frame.
For more information on this method see the Adobe help section: Freeze a Frame.
Exporting an Actual Image
Begin by parking your playhead over the frame you’d like to freeze.
Then press the camera icon in the Program window or select the Program window and use the shortcut key Shift-E.
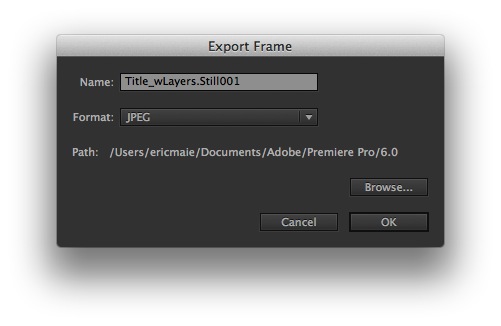
You’ll be presented with the Export Frame pop-up window.
By default, Premiere Pro uses the name of your sequence followed by a number. You should change this to a more descriptive name.
Choose a file format.JPEG works fine.
Finally, press the Browse button to choose an export directory.
A good place to store these files is in ProjectName/Images/Freeze_Frames. Fortunately, Premiere Pro will retain this path the next time you export a still.
To import, simply drag your still image from the Finder back into the Premiere Pro Project window. Here too, you can store them in a bin named Freeze_Frames (preferably inside of your Images bin).
It can be a hassle to continuously navigate to the ProjectName/Images/Freeze_Frames directory. One way around this is to drag the Freeze Frame window to the sidebar of your Finder Window for easy access.
To learn more about how our producers are using Adobe Premiere Pro see our other blog posts on the topic. Also, follow our producers’ twitter feed @PrProShortcuts for Premiere shortcuts.
To learn more about our production style, you can purchase a copy of our Post-production Workflow. Readers who purchase our current Final Cut Pro and Aperture workflow automatically receive the Premiere workflow when it is released.
MediaStorm offers several online and in-person training opportunities at mediastorm.com/train.
Have you made a recent switch in your editing software? Let us know about it in the comments below.


