
This article is part of a new series of posts with tips and tricks from our producers’ experience working with Adobe Production Pro after years of working in Final Cut Pro. To read more about why we made the switch, check out this post.
Today’s post was written by MediaStorm producer Tim McLaughlin.
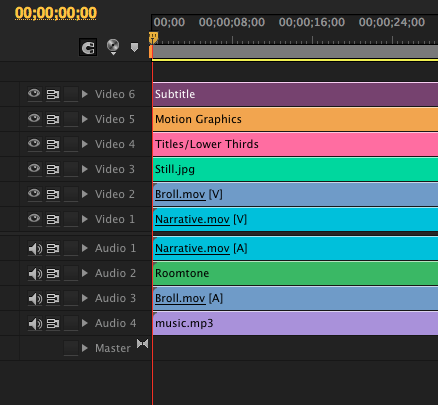
At MediaStorm, we use tracks to organize by asset type on the timeline. It gives our timeline a level of organization and visual clarity that allows us to find specific items quickly. Additionally, because we often work on each others timelines, it gives us an immediate sense of familiarity with one another’s projects.
One of my favorite options in Adobe Premiere Pro is the ability to color code assets directly on the timeline, making the visual organization of the timeline all the more obvious. Below you’ll see a timeline color coded by asset. This post will teach you how to replicate this color coding, and how to get Premiere Pro to automatically color assets correctly on import.

First, let’s take a look at the options we have in Premiere Pro’s options panel.
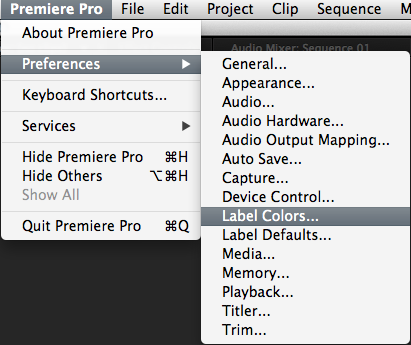
Go to Premiere Pro > Label Colors.
By default, this is what you’ll see:
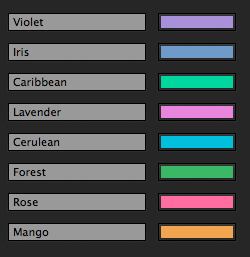
Both the colors and the names of the colors are editable. Click on either cell, and you can change the name associated with a color, or you can change the color itself.
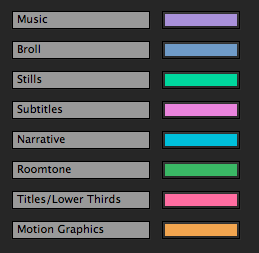
We tend to leave the colors as default, but we do change the names of those colors to match the assets we use on a timeline. The asset we associate with each color is listed in the photo below.
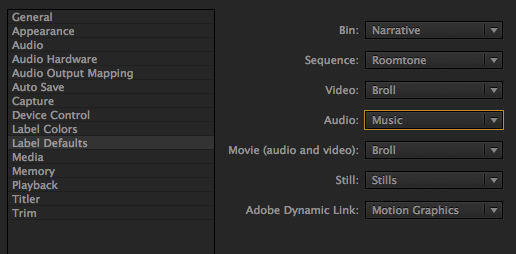
While in Preferences, let’s take a look at the Label Defaults pane. Label Defaults allows you to choose what colors Premiere Pro associates with specific asset types on import.
Below are the settings we use. We leave Bin and Sequence as default. Video, Audio, Movie, Still and Adobe Dynamic Link are all changed to reflect the colors set above.
It’s important to note that this will only change the Label Colors of those assets imported after you’ve changed them in Preferences. Anything you’ve already imported will remain the same.
To change the Label Colors of these assets, you can do so by right-clicking on the asset in the timeline, going to Label, and choosing the appropriate label for the asset. You can also follow the same steps for those assets in the Project pane.

To learn more about how our producers are using Adobe Premiere Pro see our other blog posts on the topic. Also, follow our producers’ twitter feed @PrProShortcuts for Premiere shortcuts.
To learn more about our production style, you can purchase a copy of our Post-production Workflow. Readers who purchase our current Final Cut Pro and Aperture workflow automatically receive the Premiere workflow when it is released.
MediaStorm offers several online and in-person training opportunities at mediastorm.com/train.
Have you made a recent switch in your editing software? Let us know about it in the comments below.