This article is part of a series of posts with tips and tricks from our producers’ experience working with Adobe Premiere Pro CC after years of working in Final Cut Pro. To read more about why we made the switch, check out this post.
If you record interviews with more than one camera–and you should if you can–you’ll need to sync your footage before you begin to edit.
Premiere Pro CC provides a method to do this but only if every clip contains a sync marker such as a hand clap. In reality, clapping each time you stop and start your camera is not practical, especially during an interview.
Correction: Premiere Pro CC does allows you to sync clips via audio waveforms, but I’ve found it a cumbersome process that does not often work.
Instead, MediaStorm uses Red Giant’s PluralEye’s 3.0. It’s available for $199 with a fully-functional 30-day trial.
Adding Clips
Launch PluralEyes.
Unlike previous versions, PluralEyes is now an independent application.
Select the Camera 1 tab on the right side.
In the Finder, select all clips from your first camera angle. Drag them into this tab.
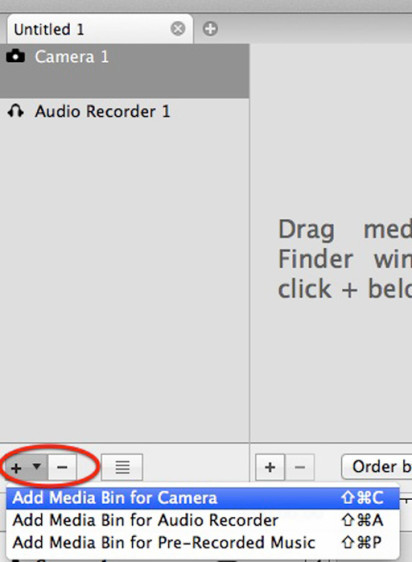
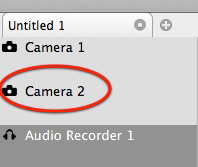
To create an additional camera tab, click the + icon below the window (Shift-Command-C)
Drag clips from your second camera angle here.
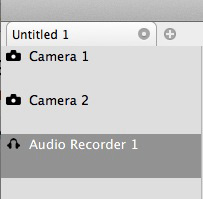
Repeat this process for each additional camera.
If you used an external audio recorder drag your audio clips on to the Audio Recorder 1 tab.
Syncing
PluralEyes syncs camera angles by comparing the audio waveforms from each camera angles. Therefore, it’s critical to record audio on each camera you use, even if it’s low quality.
From the Sync menu select Try Really Hard. This is a slower but more precise process. It’s still relatively quick as PluralEyes 3 is considerably faster than previous versions.
Finally, press the Synchronize button at the top of the window.
You’ll see PluralEyes go to work and start adjusting clips on the application timeline.
Exporting From PluralEyes
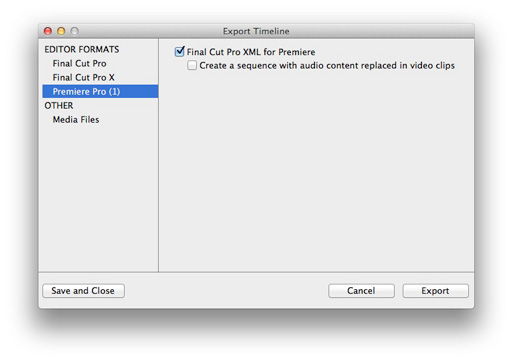
When the process is complete, press the Export Timeline button.
In the pop-up Export Timeline window, choose Premiere Pro and check Final Cut Pro XML for Premiere.
Press Export.
PluralEyes will export an XML file.
Importing to Premiere Pro
To import into Premiere Pro, simply select File > Import (Command-I) and choose your PluralEyes XML file.
Premiere Pro will rebuild your synced sequence.
Sometimes you may find that your files mysteriously appear offline. Rather than reconnect them, I’ve found it easier to save then quit. When you reopen your project, the files should reappear back online.
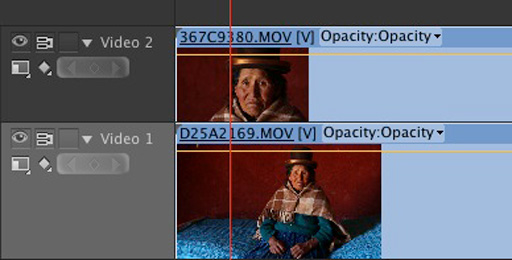
Notice that PluralEyes stacks your camera angles on top of each other, each on a separate video track.
In order to see what’s on video track 1, you must first select, then disable (Command-Shift-E) the clip on track 2. This is a time consuming process.
In part 2 of this essay, I will explain how to set up a multi-camera sequences so that you can see all available angles at the same time as well as easily cut between them.
To learn more about how our producers are using Adobe Premiere Pro see our other blog posts on the topic. Also, follow our producers’ twitter feed @PrProShortcuts for Premiere shortcuts.
To learn more about our production style, you can purchase a copy of our Post-production Workflow. Readers who purchase our current Final Cut Pro and Aperture workflow automatically receive the Premiere workflow when it is released.
MediaStorm offers several online and in-person training opportunities at mediastorm.com/train.
Have you made a recent switch in your editing software? Let us know about it in the comments below.


