

This article is part of a series of posts with tips and tricks from our producers’ experience working with Adobe Premiere Pro CC after years of working in Final Cut Pro. To read more about why we made the switch, check out this post.
In this post, I’ll show how to drastically increase your logging speed in Premiere Pro CC using Stairway Software’s $36 Keyboard Maestro.
Keyboard Maestro is a macro utility. When a user inputs a single keyboard shortcut, Keyboard Maestro will respond with a series of predefined actions. For our purposes, we’ll enter one Premiere Pro keyboard shortcut, and Keyboard Maestro will respond with a string of additional shortcuts.
It’s a powerful solution to repetitive tasks.
What follows is a bit involved but trust me, in the end, you’ll be saving loads of time.
The Premiere Pro Way
First, some background, at MediaStorm we raise video one channel to indicate a selection.
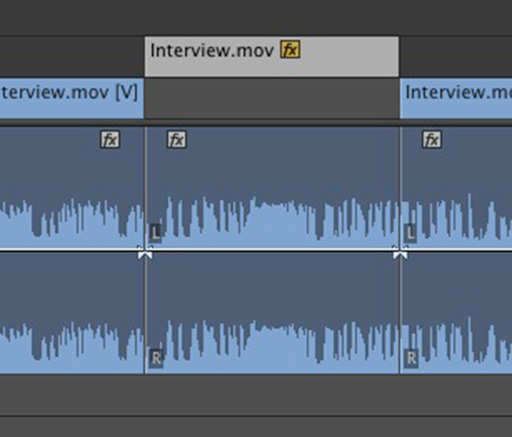
To do this, you’ll need to first create a shortcut key in Premiere Pro CC to nudge clips up one channel. We use the combination Option-Up Arrow (To set up this shortcut, see my previous post MediaStorm’s Guide to Nudging in Premiere Pro CC.)
The workflow for raising a clip is as follows:
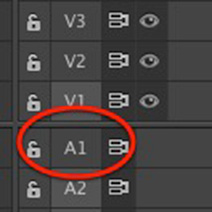
First, turn off the selection tool for audio channel 1.
Use Command-Shift-K to slice through both video and audio channels at your In point.
Find your outpoint.
Use Command-Shift-K again to slice through both video and audio channels at your Out point.
Press the back arrow key to step back one frame.
Press the d key to select the video track beneath the playhead.
Press the Option-up arrow to raise the video selection up one track.
Press the down arrow key to jump back to the Out point again and continue logging.
It’s tedious, to be sure. Five shortcut keys to raise your video and return to the out point. Keyboard Maestro though can do it with one shortcut key!
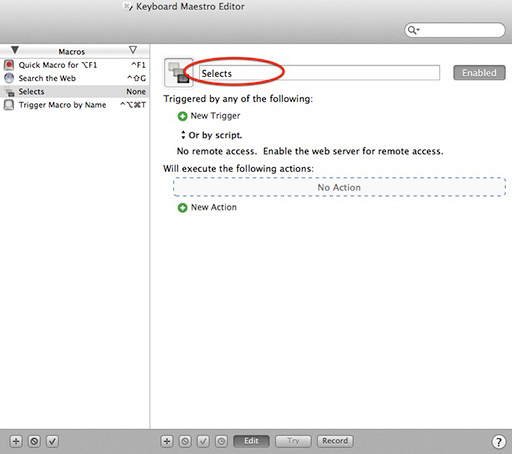
Launch the application.
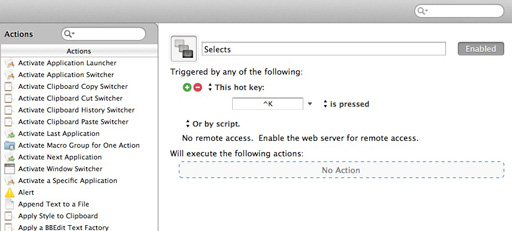
Press Command-N to create a new macro.
Name it Selects.
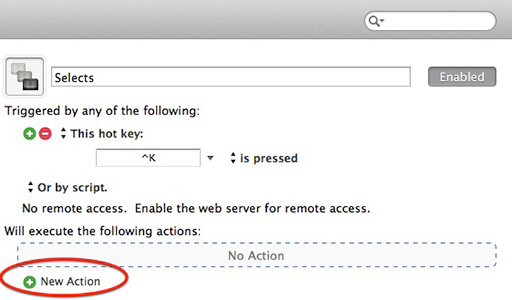
Click the green plus button adjacent to New Trigger and select Hot Key Trigger from the pop up window.

This is the shortcut key that will activate your macro. We use the shortcut key Control-K as it’s similar to Premiere Pro default slice shortcut Command-Shift-K.

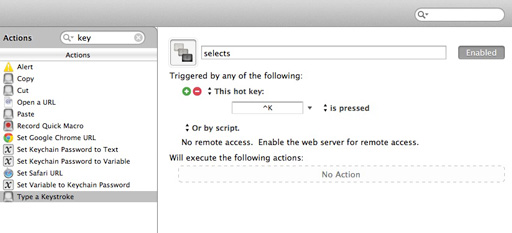
Next, click the New Action button at the bottom of the window.
The Actions window will appear on the left.
Search for Type a Keystroke then double click it.
 Select the Return field.
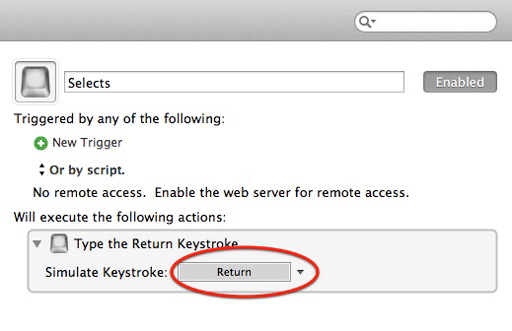 Type the keystroke Command-Shift-K.
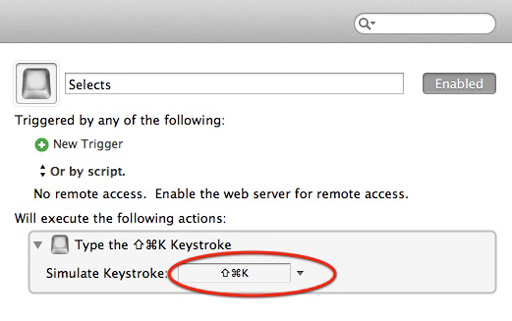
Repeat this process using the 5 keystrokes outlined above and your window looks like this:
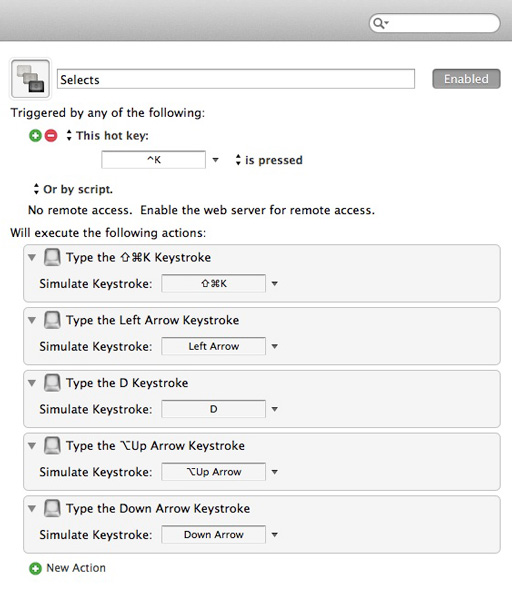
Finally, turn off the Edit button at the bottom of the window.
![]()
With Keyboard Maestro still open, return to Premiere Pro and make a slice (Command-Shift K) at an IN point on your timeline. Find your Out point and press the shortcut Control-K to activate the Selects macro.
Bam–five keyboard strokes for the price of one. Well worth the money.
To learn more about how our producers are using Adobe Premiere Pro see our other blog posts on the topic. Also, follow our producers’ twitter feed @PrProShortcuts for Premiere shortcuts.
To learn more about our production style, you can purchase a copy of our Post-production Workflow. Readers who purchase our current Final Cut Pro and Aperture workflow automatically receive the Premiere workflow when it is released.
MediaStorm offers several online and in-person training opportunities at mediastorm.com/train.
Have you made a recent switch in your editing software? Let us know about it in the comments below.