MediaStorm Guide to Using Adobe Lightroom with Premiere Pro

This article is part of a series of posts with tips and tricks from our producers’ experience working with Adobe Premiere Pro CC after years of working in Final Cut Pro. To read more about why we made the switch, check out this post.


Adiós Aperture

Apple recently announced its plans to retire both Aperture and iPhoto. The company will create one unified application, titled Photos, that will be part of OS X Yosemite.

While Yosemite will continue to support Aperture, as well as provide an upgrade path for Photos compatibility, development of Aperture will cease. (It’s worth noting that the last major upgrade to Aperture was version 3.5, released in October 2013.)

Aperture users are left with three basic options:

  • Continue to work in Aperture, in the same manner that some still use Final Cut Pro 7.
  • Adopt Photos in to their workflows when it becomes available.
  • Use an alternative application like Adobe’s Lightroom.

While some suggest that Photos will be a powerful replacement for iPhoto and Aperture, Macworld author David Sparks states, “The desktop Photos app likely won’t offer all the power that currently exists in Aperture; I’m certain its photo-alteration tools will take a hit.”

I hope that’s not the case. Nevertheless, MediaStorm is now considering adopting Lightroom in to our post-production workflow.

(more…)

Continue ReadingMediaStorm Guide to Using Adobe Lightroom with Premiere Pro

New Features in Premiere Pro CC (2014)

This article is part of a series of posts with tips and tricks from our producers' experience working with Adobe Premiere Pro CC after years of working in Final Cut Pro. To read more about why we made the switch, check out this post. In June, Adobe released major updates across their Creative Cloud suite of applications, including Premiere Pro CC. In the coming weeks, I will show you some of these great new features. First though, here are some highlights that are most exciting: Browse After Effects projects in the Media Browser. Audio pitch remains the same when you shuttle forwards and back. The ability to select all tracks backwards. Select multiple transitions and change their durations simultaneously. Match Frame backwards, from the Source window to the Timeline. Tag ‘favorites’ in the Media Browser. Automatically back up autosave files to Adobe’s Creative Cloud. All video and audio tracks can be locked…

Continue ReadingNew Features in Premiere Pro CC (2014)

MediaStorm Guide to Auto Saving Premiere Backups to the Cloud

This article is part of a series of posts with tips and tricks from our producers’ experience working with Adobe Premiere Pro CC after years of working in Final Cut Pro. To read more about why we made the switch, check out this post.


When it comes to backups, you can never have enough.

Fortunately, Premiere Pro’s Auto Save vault (File > Project Settings > Scratch Disks…) allows you to backup your project file at user-specified intervals.

I’ve written previously about how to enhance this functionality with Noodlesoft’s $25 Hazel. Hazel essentially watches your vault for updated versions and then copies them to a secondary destination of your choice, all automated and in real time.

The reason for this added protection is that even if you backup your work every evening, what happens if your drive dies in the middle of the afternoon? You could potentially lose hours of work.

With the advent of  Premiere Pro CC, Adobe now offers users 20GB of free online storage. This makes for another great location to store automated backups. With the assistance of Hazel, you can think of this storage as an Auto Save vault in the cloud.

Setting Up Creative Cloud

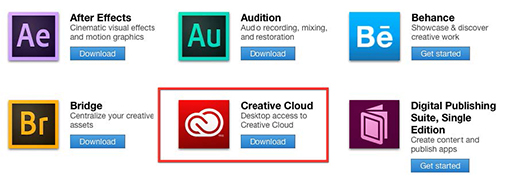
To set up your online storage, log in to creative.adobe.com, select Download Center on the menu bar and choose the Creative Cloud application.

(more…)

Continue ReadingMediaStorm Guide to Auto Saving Premiere Backups to the Cloud

MediaStorm Guide to Creating Smart Quotes in Premiere Pro’s Title Tool

This article is part of a series of posts with tips and tricks from our producers' experience working with Adobe Premiere Pro CC after years of working in Final Cut Pro. To read more about why we made the switch, check out this post. I've noticed that Premiere Pro’s title tool (Command-T) does not automatically convert quotation mark to smart quotes, sometimes called curly quotes. By default quotation marks look like this: To create smart quotes on a Mac simply use the keystroke Option-[ (Option-Open Bracket) for an open smart quote and Option-Shift-[ (Option-Shift-Open Bracket) for a closed smart quote. Much nicer.

Continue ReadingMediaStorm Guide to Creating Smart Quotes in Premiere Pro’s Title Tool

MediaStorm Guide to Adding EQ Presence

This article is part of a series of posts with tips and tricks from our producers’ experience working with Adobe Premiere Pro CC after years of working in Final Cut Pro. To read more about why we made the switch, check out this post.


A few weeks ago at a family function, I started chatting with the guy running the soundboard. I asked how could I make the vocal audio sound better.

He said, all things being equal, the trick was to add 3 or 4 dB at about 3500 kHz.

I’ll walk you through how to do that in Premiere Pro.

First, from the Effects window, search for EQ.

Drag the effect on to the audio clip you’d like to change. Then, double click the audio selection so that it opens in the Source window.

In the Effects Control window you’ll see all of the EQ options.

(more…)

Continue ReadingMediaStorm Guide to Adding EQ Presence